11.- RUNAWAY like MOUSE
interaction. (FOR VERSION 2.8.2 but applicable to V3.1
This tutorial will be updated
soon
This
tutorial will teach you how you can achieve a mouse interface similar to the
one used in RUNAWAY.
Before I
start I would suggest you to get a bit more familiar with Visionaire
and for that I recommend you read the previous tutorials in this site.
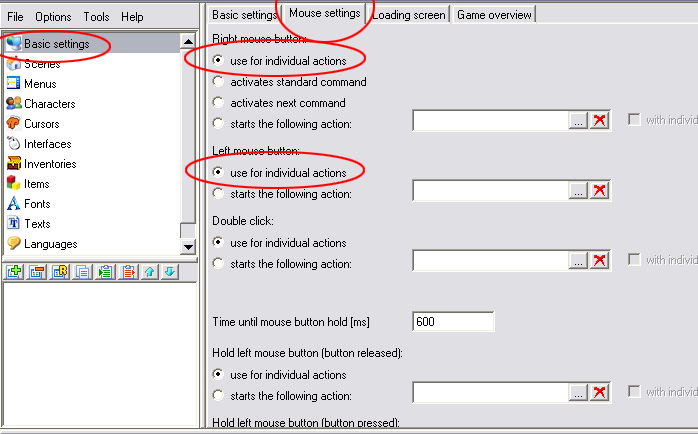
The very
first thing you should change is the “MOUSE
SETTINGS”, if you’ve played RUNAWAY you should remember the
cursor only changed while it touched interactive objects or characters and you
could change your mouse cursor ONLY
if your mouse stayed INSIDE
the interactive area, so we are going to set the “USE FOR INDIVIDUAL ACTIONS”
in both the left and right mouse buttons.
That is
basically it, now with this you MUST create ALL interactions in your object’s actions.
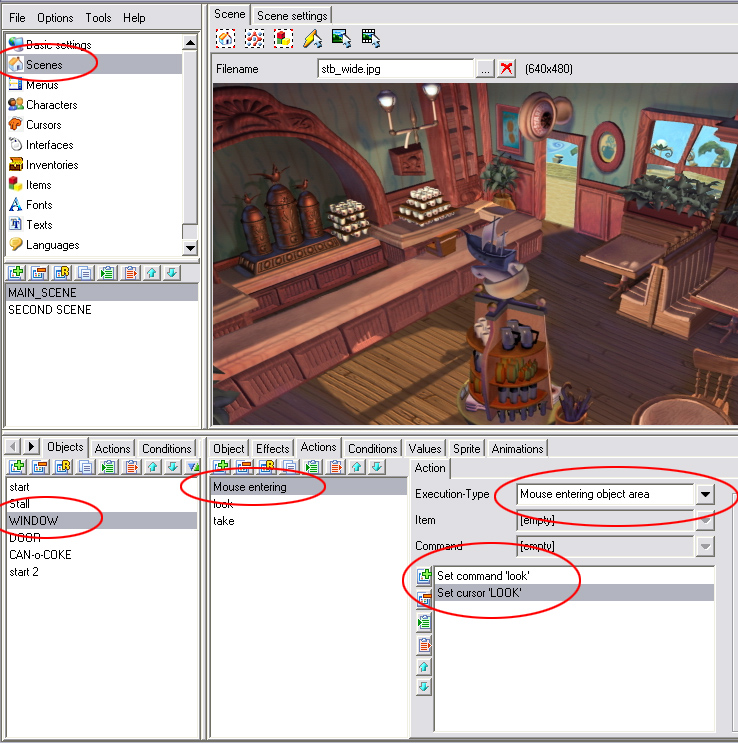
So now you
go to your SCENES and create in your object’s ACTIONS a “MOUSE
ENTERING” execution type
And add the
action SET COMMAND “LOOK” And SET
CURSOR “LOOK”
(I chose look since in RUNAWAY it changed to the look
cursor by default)
Now we must
create an interaction “off”, so when the cursor leaves the interactive area it
resets back to the main pointer.
Since my
main pointer is the WALK cursor that is the one I’m choosing, but it could be a
pointer, a hand… whatever.
So for this
we add an action “MOUSE LEAVING OBJECT
AREA” and add the “SET COMMAND”
and “SET CURSOR” to the pointer so
in this case I selected the WALK cursor and walk command.

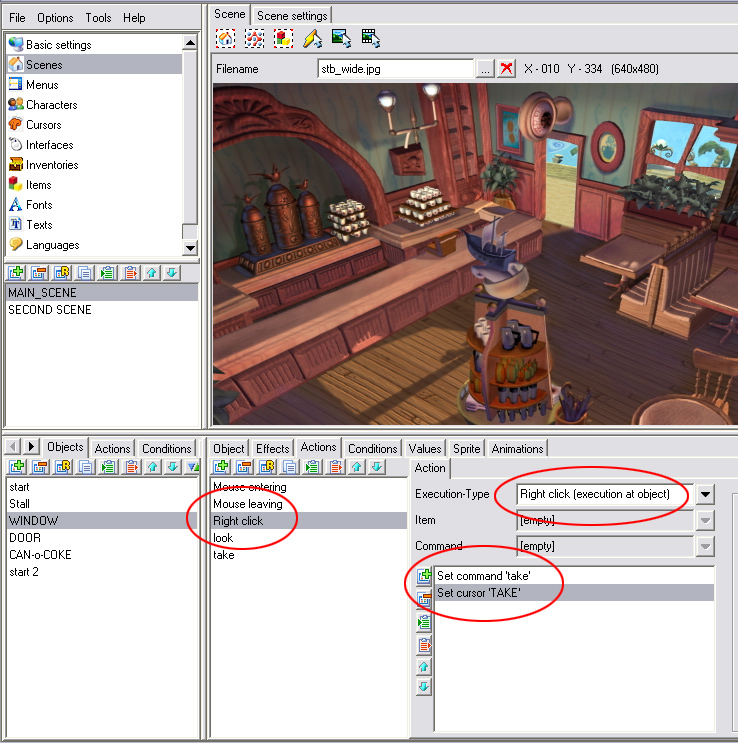
OK, now,
remember in RUNAWAY you could only
change to a TAKE cursor if it was an object and to a TALK cursor if it was a
character? Well to make that command we are going to add another action this
time the execution type “RIGHT CLICK
(EXECUTION AT OBJECT)” and we again add the SET COMMAND and SET
CURSOR this time for the TAKE
cursor (if it was a character then you would create it for the TALK cursor)
Save and
test it…. GREAT isn’t it?, well, the only catch of
this method is you must create this interaction in EVERY object and
character. But it un-clutters your game a huge deal and you still have quite
some interaction.
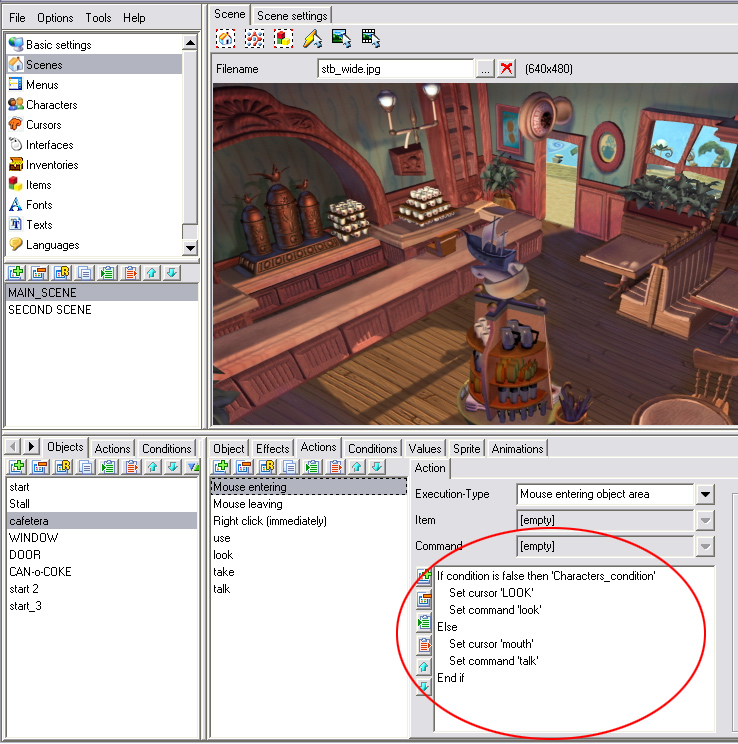
Again, you
can also create conditions and expand the interactivity; the following image is
for a test I was using for two playable characters, so in essence if character one
was selected then the TALK cursor appeared,
but if the second character was selected then the LOOK cursor appeared.
The RIGHT
CLICK command had an IF
statement similar to the one of the example bellow stating a TAKE cursor for the character one
and a TALK for character two.
(NOW
is your time to be creative, use conditions mixed with IF/ELSE actions and you
can have great long interactions but for this tutorial it cant be easier to
teach than this ^^)