7.- CREATING A MENU
Menus are
time consuming but are easy to create, you just have to focus on matching the
same numbers in the configurations (youll understand what I mean while you
read)
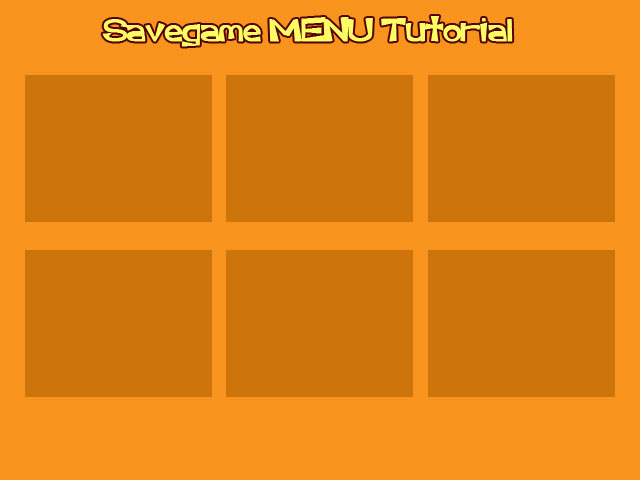
Lets create
a MENU in the SCENES AND MENUS panel
![]() and load the image you will use as background
in the properties panel, for this tutorial I created this one:
and load the image you will use as background
in the properties panel, for this tutorial I created this one:
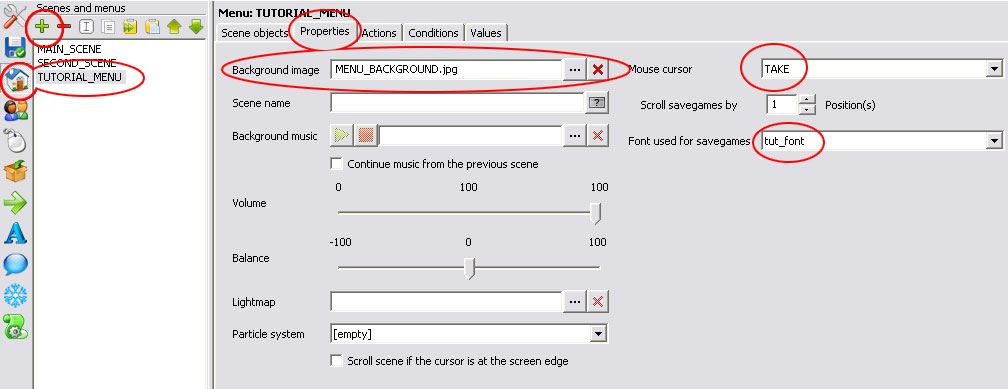
We also
establish a cursor for the MENU, I selected the TAKE
cursor and also established the font (you can create specific fonts for each
character and menu)
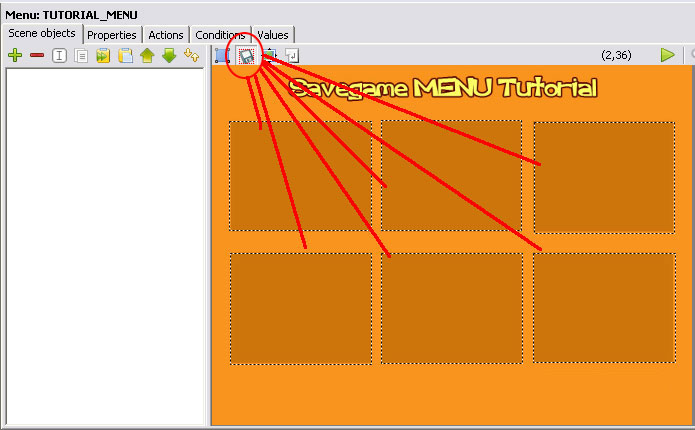
Now we are
going to create the SAVEGAME-AREAS ![]() of all the 6 boxes I created in the menu
image, These areas will contain the screenshots of the
scenes where you saved your games.
of all the 6 boxes I created in the menu
image, These areas will contain the screenshots of the
scenes where you saved your games.
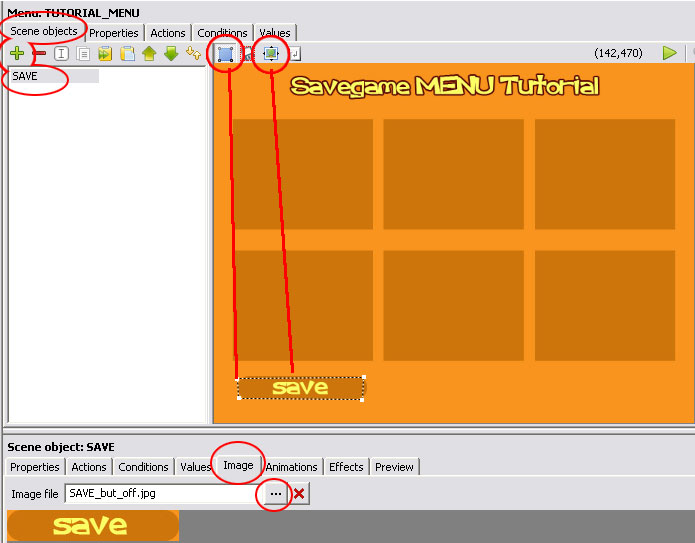
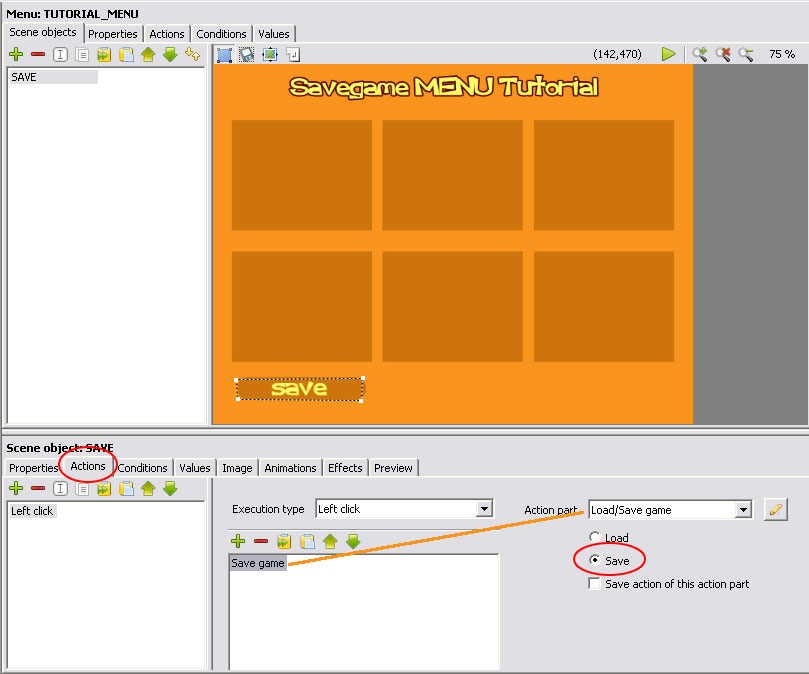
Now we add
the SAVE button object, we establish the image of the button, then move it to
its final place, and create the polygonal object.
We take
this time and create the action for this button, so we go to the ACTIONS panel
and add an action for the LEFT CLICK
, the action part will be set to LOAD/SAVE game with the SAVE option since its
the SAVE button.
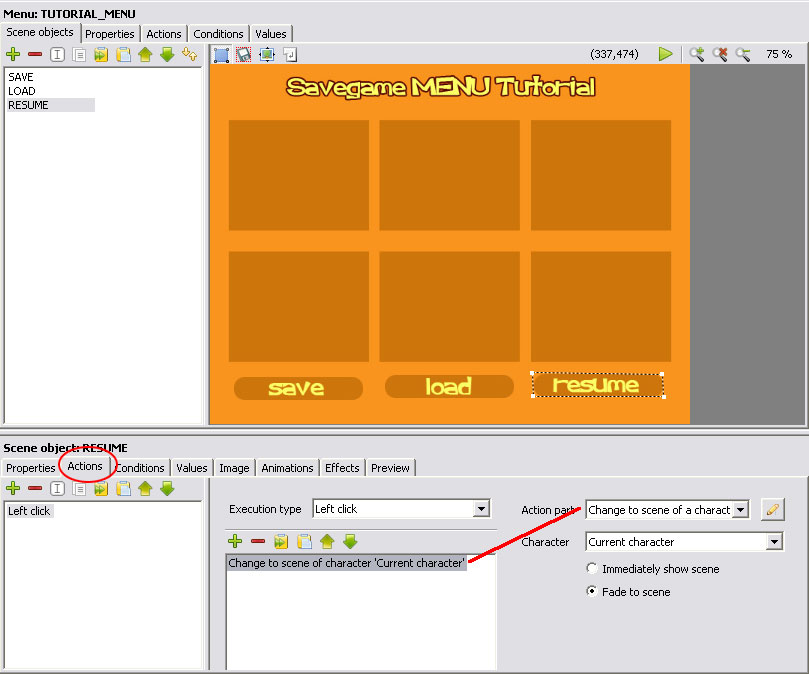
Create the
same procedure for the LOAD and resume Buttons, but choose LOAD in the Load
button action part, and for the RESUME button use the CHANGE TO SCENE OF A CHARACTER action part, so it returns to the
scene again.
Now we are
going to create the savegame selection areas, for
this we create an image of the highlight effect with the transparent inside, we
create a new scene object and name it POSITION_ON_1,
load the image and place it in the first box area. Then we create its polygon
area so it can become clickable.
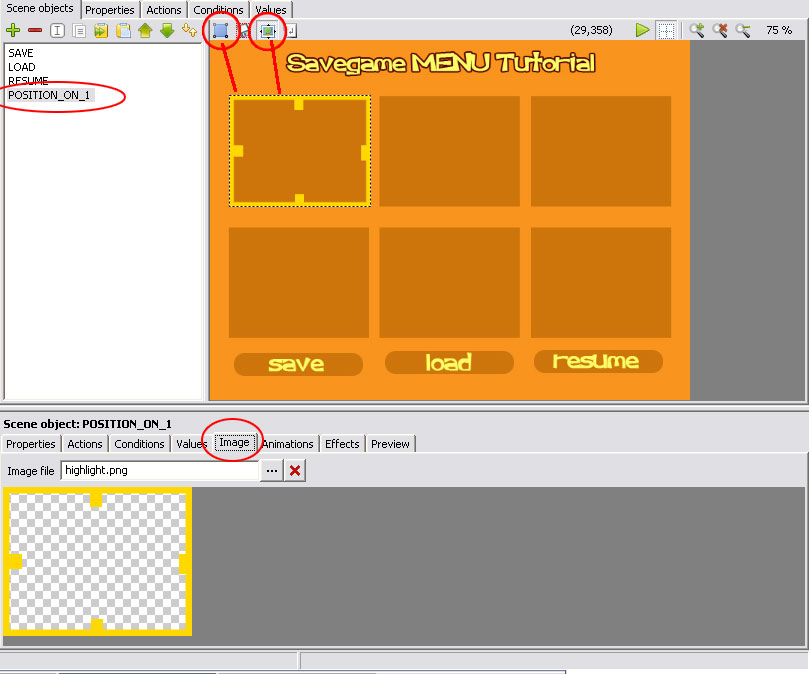
Repeat this
procedure for the other 5 boxes.
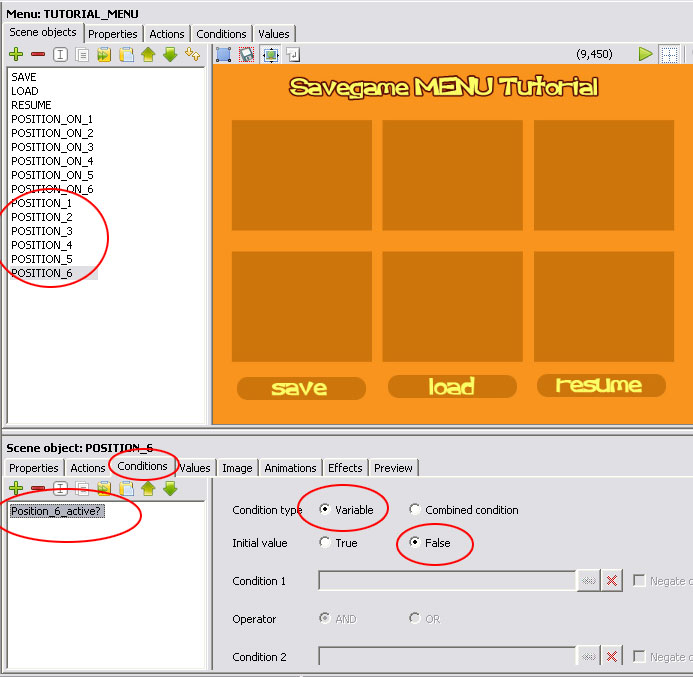
Now we are
going to create 6 new objects called POSITION_(number)
One for each box, and in the CONDITIONS
panel we are going to create one condition for each POSITION named
respectively to its number. That means, POSITION_1
will have a condition called POSITION_1_ACTIVE?,
POSITION_2 will have a condition
called POSITION_2_ACTIVE?, and so forth. ALL of these conditions must be Variables
set as FALSE, This means the
selection images well not be displayed unless they change their condition to TRUE.
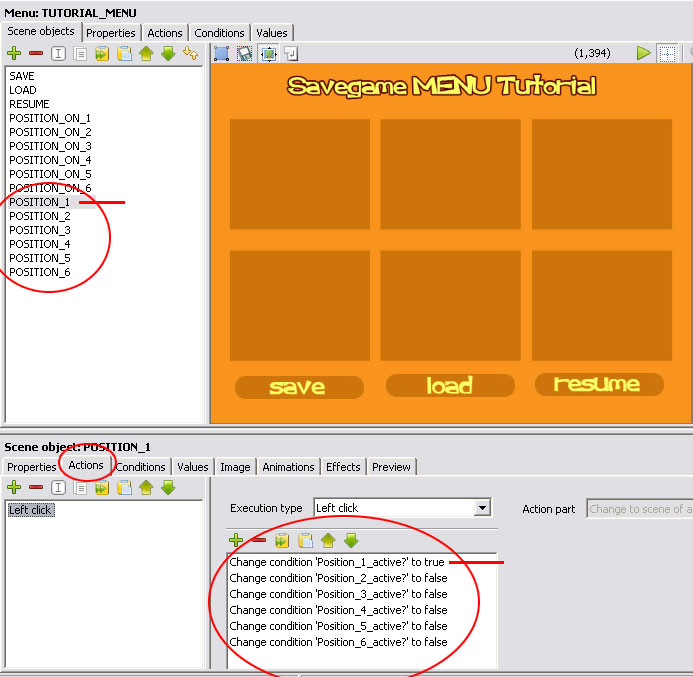
Now we go
to the ACTIONS panel for each POSITION_(number) and
create six actions, all similar of CHANGE
CONDITION POSITION_(1,2,3,4,5,6)_ACTIVE? to FALSE with the exception of
the condition of the same position.
This means
.-POSITION_1 will have every CHANGE CONDITION POSITION_(2,3,4,5,6)_ACTIVE?
to FALSE except the CHANGE CONDITION
POSITION_1_ACTIVE which will be TRUE.
.-POSITION_2 will have every CHANGE CONDITION POSITION_(1,3,4,5,6)_ACTIVE?
to FALSE except the CHANGE CONDITION
POSITION_2_ACTIVE which will be TRUE.
.-POSITION_3 will have every CHANGE CONDITION POSITION_(1,2,4,5,6)_ACTIVE?
to FALSE except the CHANGE CONDITION
POSITION_3_ACTIVE which will be TRUE.
And so
forth with the rest
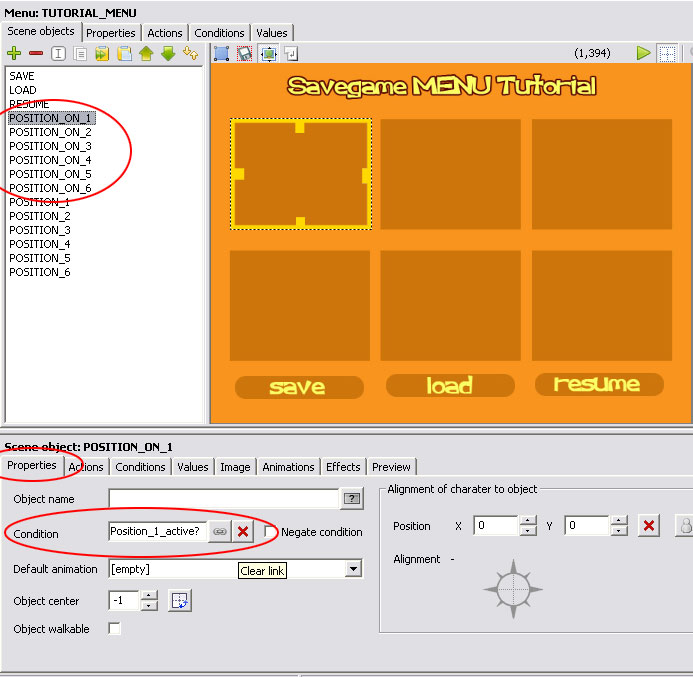
NOW we
select the POSITION_ON_(1,2,3,4,5,6)
and under PROPERTIES we are going to
establish the condition we created of the POSITION_
of the same number.
This means:
POSITION_ON_1 will have the condition
POSITION_1_ACTIVE? in its
properties.
POSITION_ON_2 will have the condition
POSITION_2_ACTIVE? in its
properties.
POSITION_ON_3 will have the condition
POSITION_3_ACTIVE? in its
properties.
POSITION_ON_4 will have the condition
POSITION_4_ACTIVE? in its
properties.
POSITION_ON_5 will have the condition
POSITION_5_ACTIVE? in its
properties.
POSITION_ON_6 will have the condition
POSITION_6_ACTIVE? in its
properties.
Now, to
load the MENU we are going to create a KEY for it, so go to the GAME panel ![]() and in the KEY ACTIONS tab create a new action
for the F1 key.
and in the KEY ACTIONS tab create a new action
for the F1 key.
The action
part should be SHOW SCENE/MENU and the MENU should be selected.

That is all
there is to it for creating MENUS, do a SAVE-RUN and
test it.