4.- The First Scene
Ok, now we
are ready to create scenes, first you should think what resolution are you
going to need, nowadays 1024x768 seems pretty standard and current and a bit old
computers can handle it, but for this tutorials sake Im going to set it at
600x480, I will also going to be using two backgrounds from the game Monkey
Island 4, but Im using them
for educational purposes ONLY.
So lets go
to the SCENE and MENUS ![]() tab and create
tab and create ![]() a new SCENE (it will give you two choices,
scene and menu, so choose Scene since that is what we want right now) and name
it MAIN_SCENE (or what ever you
like)
a new SCENE (it will give you two choices,
scene and menu, so choose Scene since that is what we want right now) and name
it MAIN_SCENE (or what ever you
like)
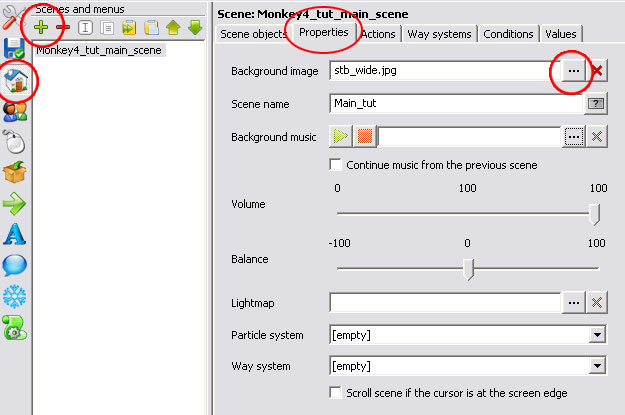
Then go
into the PROPERTIES tab and import
the background image (for this tutorial Im using a Monkey Island 4 background) You can also name
your scenes, this will be used for the save game description.
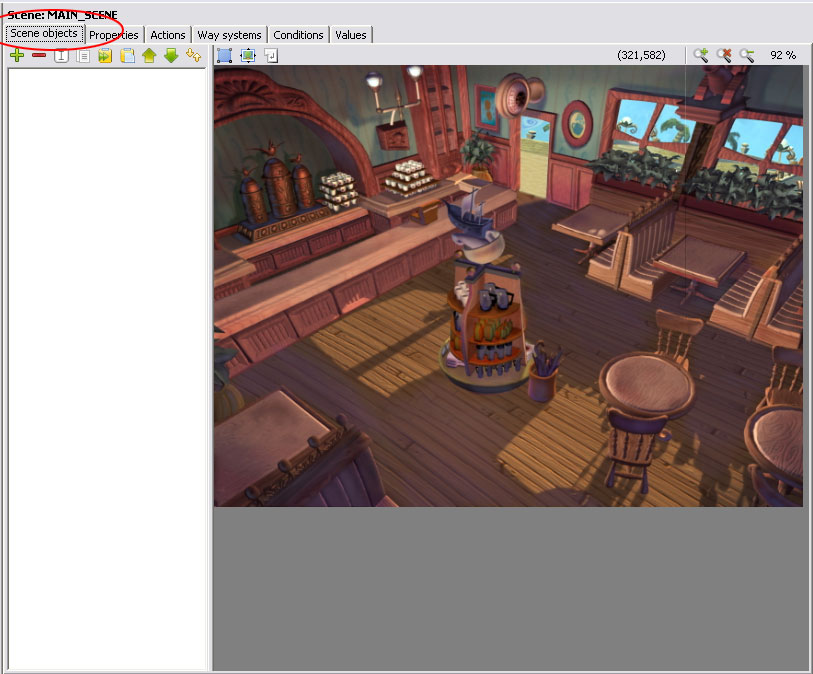
Now go to
the SCENE OBJECTS tab and you should have a background image, that is your
actual scene, but there is nothing going on right now and you cant play in it
yet..
We need to
define where the character is going to walk on, for this we need to use and get
familiar with the WAY SYSTEMS.
Go open up
the WAY SYSTEMS tab and create ![]() a new system, you can leave it with default
names but I prefer to Name everything to keep it clean.
a new system, you can leave it with default
names but I prefer to Name everything to keep it clean.
You can
create several Way systems for a single scene, if you do this you can change
the layout of a scene at any moment without having to create different scenes
for each change. One example would be to have a pillar suddenly block a path,
and at this moment the way system can change specifying the new walk able area.
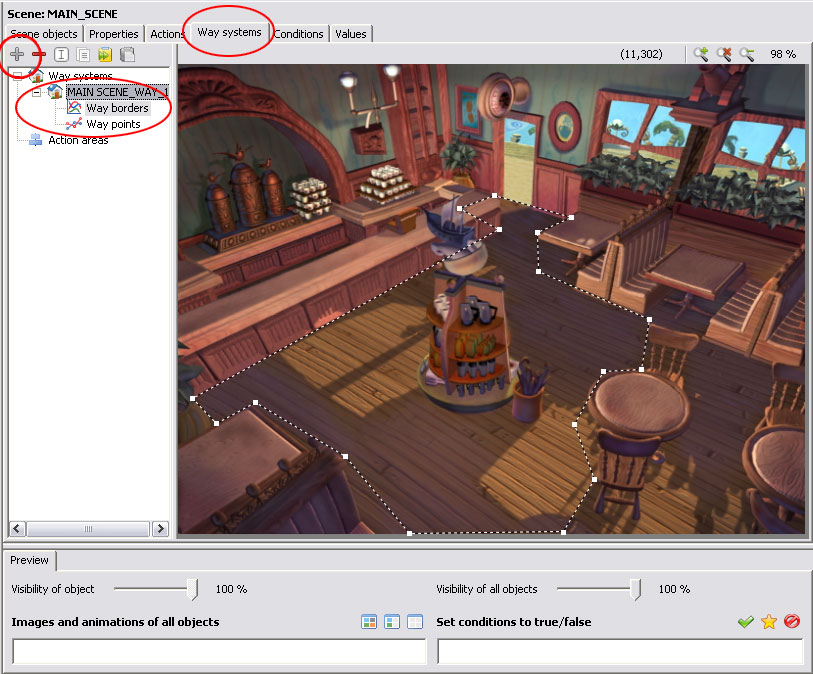
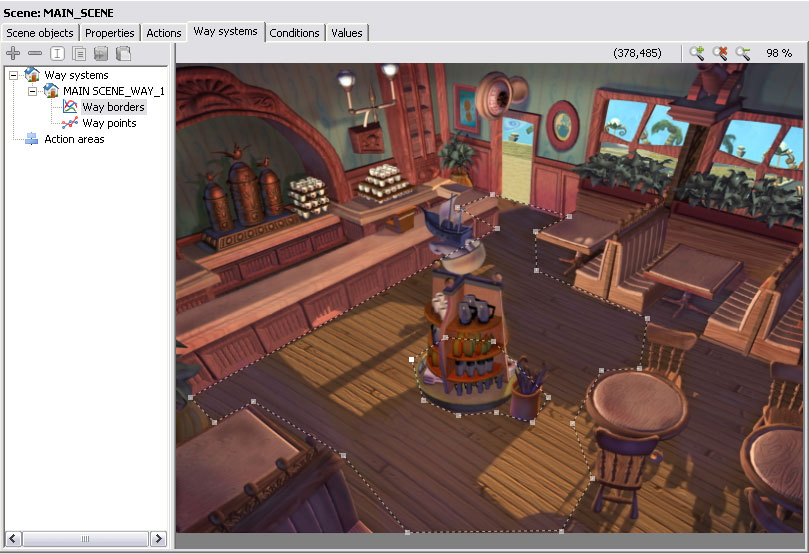
To Define
the walk able area, select the Way Borders tab ![]() and we are going to define the areas of the
floor where the character is going to walk on, something like this should do,
Note how I defined only the FLOOR and some parts like the stall and the corner
of the table in front of the door are inside the walk able area. We are going
to use images later on to cover for these.
and we are going to define the areas of the
floor where the character is going to walk on, something like this should do,
Note how I defined only the FLOOR and some parts like the stall and the corner
of the table in front of the door are inside the walk able area. We are going
to use images later on to cover for these.
Now the
scene is walk able, but we need to tell visionaire
where the character is going to start, for this tutorial I want the character
to start in the door so we are going to make a new ![]() Scene
Object and we rename it START
(follow the image bellow), then we are going to adjust that objects position,
the easiest way is by selecting the Icon
Scene
Object and we rename it START
(follow the image bellow), then we are going to adjust that objects position,
the easiest way is by selecting the Icon ![]() in the alignment box at the right, this will
open a new window with your scenes background in it and there you can click
where you want the start position to be, this will be marked as a small dot
cross. (see that the way system is displayed so you
know the floor limits for your character)
in the alignment box at the right, this will
open a new window with your scenes background in it and there you can click
where you want the start position to be, this will be marked as a small dot
cross. (see that the way system is displayed so you
know the floor limits for your character)
![]() NOTE, whenever you
adjust an objects positions you MUST place the cross INSIDE the walk able
path, if you place it outside the walk able path your character will never
reach that spot or object.
NOTE, whenever you
adjust an objects positions you MUST place the cross INSIDE the walk able
path, if you place it outside the walk able path your character will never
reach that spot or object.

SETTING THE
CHARACTER
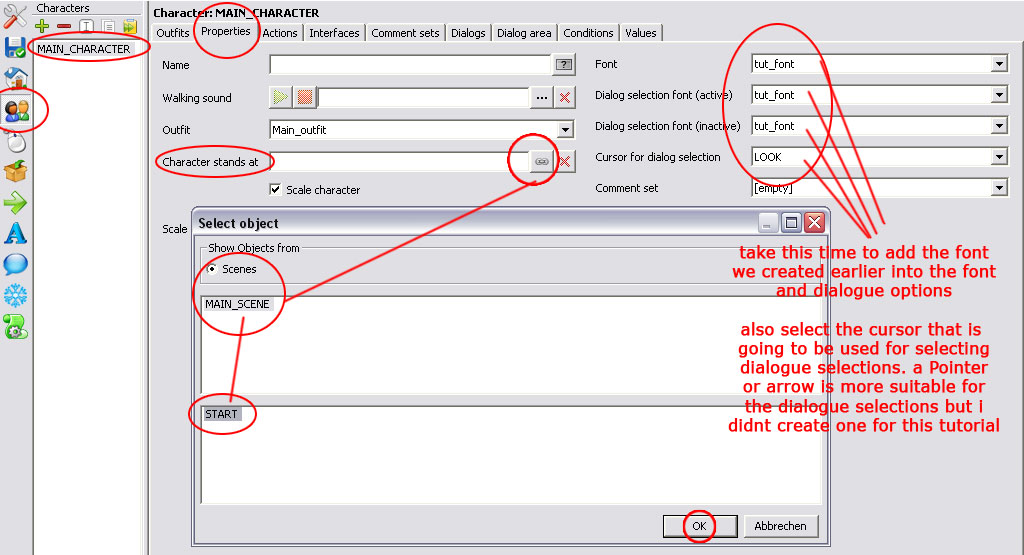
Once thats
done we can go to the Characters ![]() properties and we are going to set the initial
characters starting point (Follow the image bellow)
properties and we are going to set the initial
characters starting point (Follow the image bellow)
NOTE: Take this time to add the font we created
earlier into the font and dialogue options, also select the cursor that is
going to be used for selecting dialogue selections. A Pointer or cursor Arrow
is more suitable for the dialogue selections but I didnt create one for this
tutorial.
IMPORTANT
configurations before testing the game
Before we run
the game we must do a couple of things so we dont run into trouble.
Go to the
Game tab ![]() and go to the KEY ACTIONS tab, add
and go to the KEY ACTIONS tab, add ![]() a new action, in the execution type select the
key (keyboard keys that is) of F5.
The action we are going to select is QUIT
GAME.
a new action, in the execution type select the
key (keyboard keys that is) of F5.
The action we are going to select is QUIT
GAME.
By doing
this we can close the preview or test by hitting the F5 key on the keyboard instead of closing it trough the windows
task bar. (quite useful if we are in the fullscreen mode.)

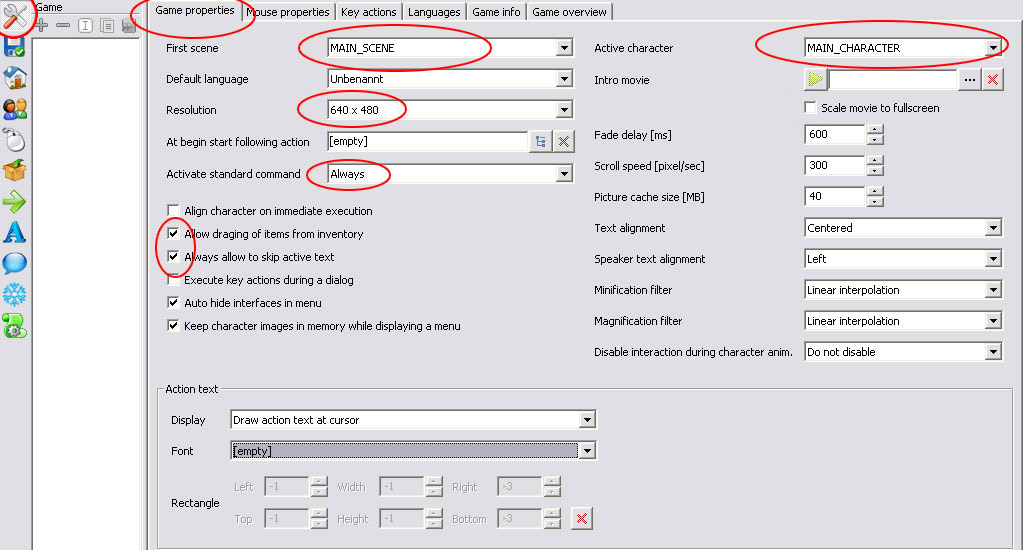
Now go to
the GAME PROPERTIES tab and
establish the scene we just created into the FIRST SCENE tab, also establish the MAIN CHARACTER as the ACTIVE
CHARACTER, take this time to set the resolution of your game (for this
tutorial I left it at 640x480), and allow dragging of items and skip active
text.
Now Save
and Run the game, GREAT, you now have a working scene, but youll notice when
you walk around that your character steps over everything and we dont want our
character to walk over the center stall display, and of course, the character
is WAY too big (this also depends on the size you created your character, but
we will fix this in visionaire).

Lets make
a hole in the base of the stall so the character cant
step into it. For this we are going to the scenes Way Systems, select the Way borders ![]() and add a new border. A way border inside
another way border creates a hole in the floor.
and add a new border. A way border inside
another way border creates a hole in the floor.
There are
two ways you can create WAY BORDERS inside other way borders, but you CANT create way borders inside other
way borders directly.
The first
and easies way is to hold the ![]() key, this will let
you create the way border for the pillars base inside the other way border
key, this will let
you create the way border for the pillars base inside the other way border
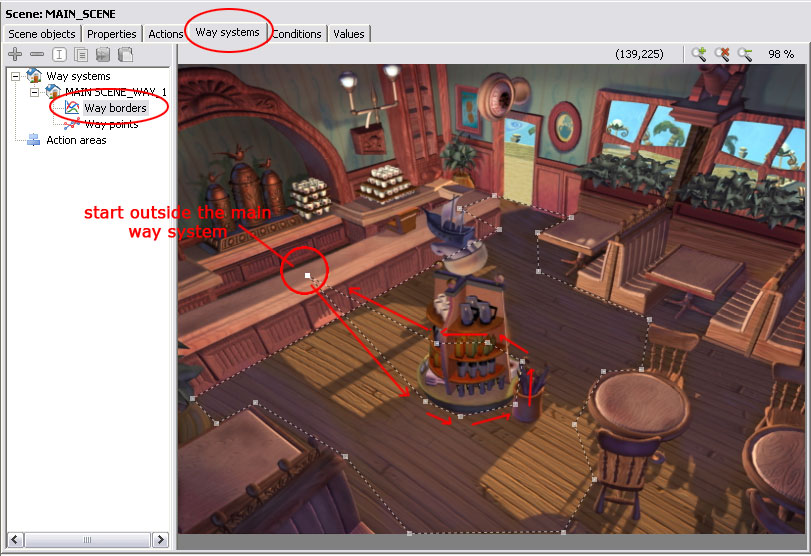
The second
way we can also create the hole way border is by starting
on an empty area and make the rest of the border in its proper place, when the
border is closed just move the initial point into its intended position.
Ok, we now
have a HOLE in the floor so our character wont walk in that area; you can
refine your initial border by adding more points if you need to.
Now, do a
save-run.
Youll
notice it will be quite hard for the character to move around now because of
that hole in the floor (and the character is still way too big)
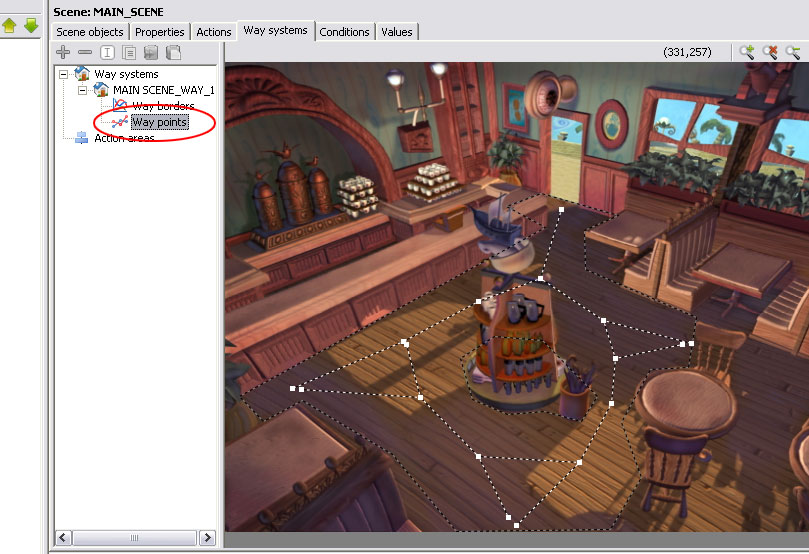
So we are going
to create some way-points, waypoints help our characters move around the scene
and around objects, so go back to the scene editor and create way-points ![]() .
.
We mostly
need to tell our characters how to walk around obstacles, and something like
this should be fine.
Save/Run
and youll notice your character now walks around the obstacle without
problems, but the character remains to bee too big.
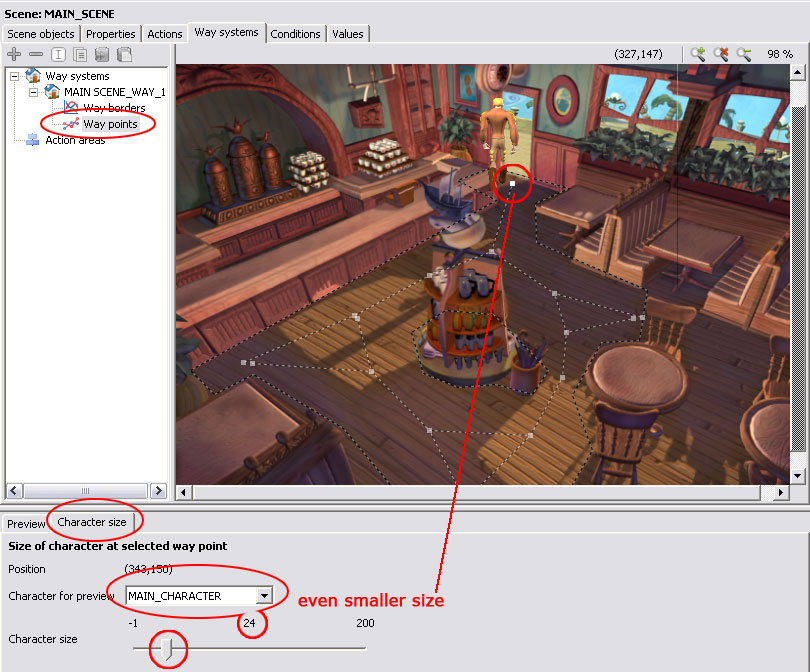
Go back to
the scene editor and lets configure a couple of the WAY-POINTS ![]() so the character can change sizes while he
walks up or down the area, for this select the closest point (lower one) and
youll notice bellow the scene area a CHARACTER SIZE settings panel, here
youll adjust the Size of the
characters, there is also a tab for displaying a preview of a character in the
scene, since we only have created on we select it and see its original size in
the scene.
so the character can change sizes while he
walks up or down the area, for this select the closest point (lower one) and
youll notice bellow the scene area a CHARACTER SIZE settings panel, here
youll adjust the Size of the
characters, there is also a tab for displaying a preview of a character in the
scene, since we only have created on we select it and see its original size in
the scene.
We can
adjust the size by manipulating the size bar, -1 means default size, but since
I wanted a smaller character I changed it to 44 (%). (you
can change the character sizes individually in the characters ![]() panel if your characters all have different
sizes.
panel if your characters all have different
sizes.

Now select
the top way point and make the character look even smaller since the door is
farther away.
You will
notice the character will change sizes when it walks to the front or back of
the scene.. cool isnt it?.
Do a
Save/Run and you should see your character change sizes while it walks to the
top or bottom of the screen. BUT, it still walks OVER a great part of the stall
in the center of the room.
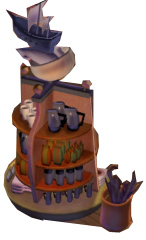
We are
going to create an object in the scene to cover the stall with an isolated
image. To illustrate the point clearly, we are going to use a cut out image of
the stall to cover it.
Something
like this with transparent background (Use PNG files with Alpha maps for this)
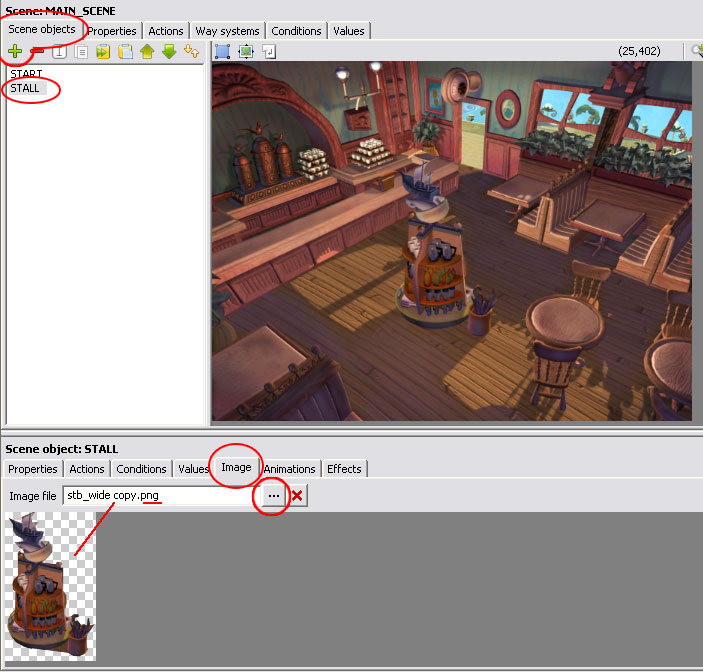
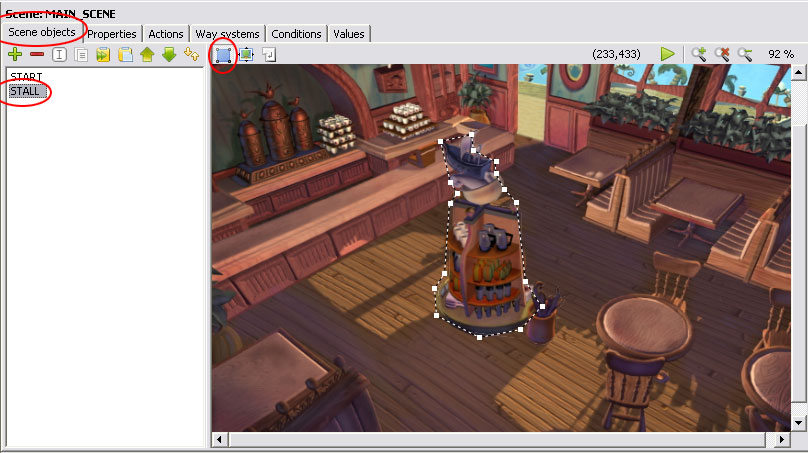
Lets
create a new object in the scene![]() , for
this tutorial I named
, for
this tutorial I named ![]() it STALL,
then in the IMAGE
tab import the image you are going to use.
it STALL,
then in the IMAGE
tab import the image you are going to use.
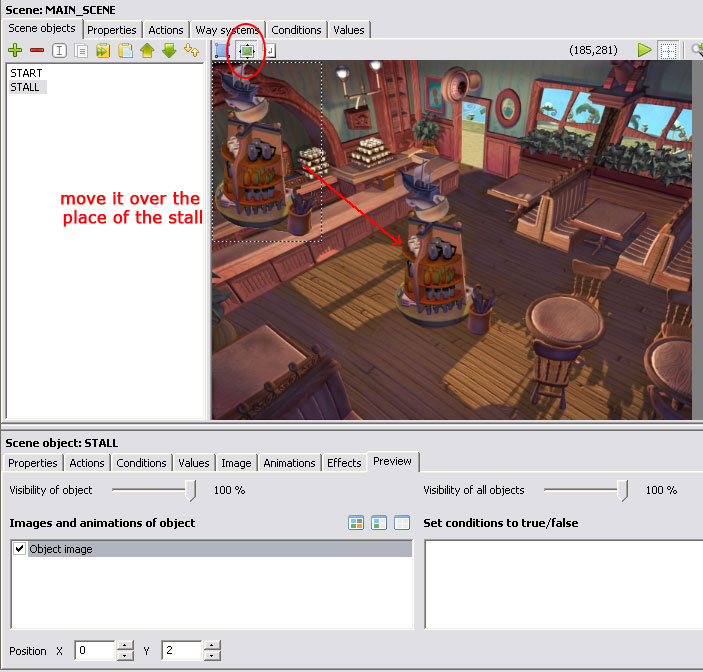
Then select
the icon PLACE IMAGES AND ANIMATIONS ![]() and move the image where you need it to be,
in this tutorial I moved it on top of the backgrounds stall since that is the
place I need covered.
and move the image where you need it to be,
in this tutorial I moved it on top of the backgrounds stall since that is the
place I need covered.
Now, before
we go testing and finding yourself in a lot of
frustrations we are going to do one thing that MUST be properly set.
In the
STALL properties we are going to establish the objects center by using the icon ![]() , a
window will pop up and we establish the center BUT we need it to be on the center of the BASE of the object, not the image itself.
, a
window will pop up and we establish the center BUT we need it to be on the center of the BASE of the object, not the image itself.
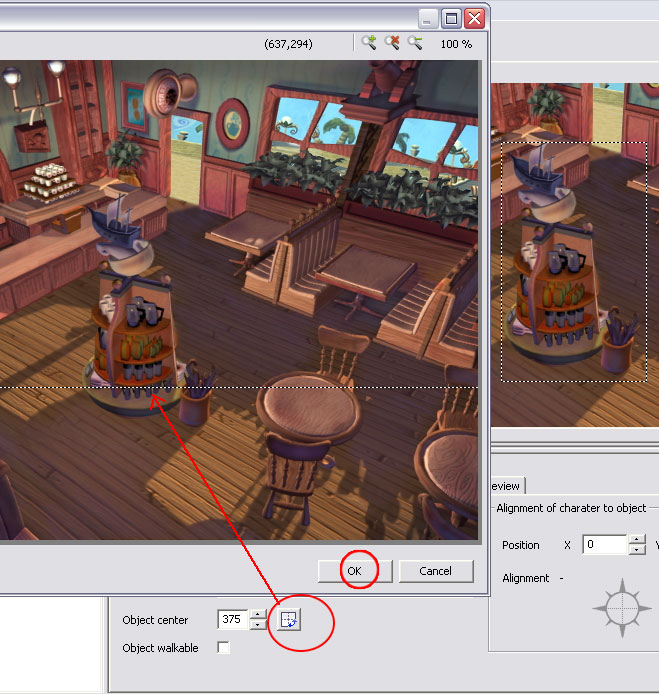
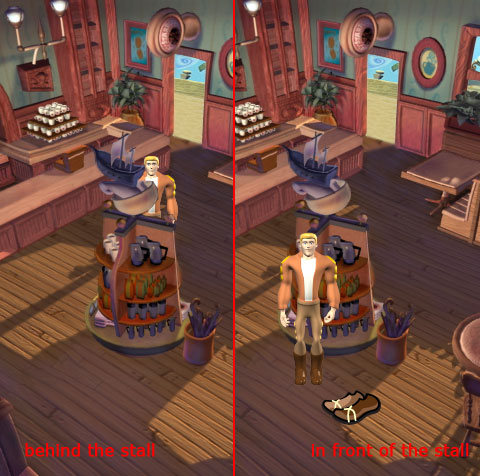
Do a save/run
and you should see the character gets covered when it goes behind the stall and
when it comes around he can be seen in front of it.
CREATING
INTERACTIVITY
OK, now
what?, lets create some basic interactivity, we
created a Take/Use and a Look at icons, so we can start with those and our new
object, the Stall.
Before
creating the interaction we must tell the game what areas are going to be the
triggers of the interactions this is done for EACH object, so we click on
create polygonal areas ![]() and create a shape that covers your object,
since this is the stall I covered that object (you dont need the polygonal
object to bee too defined)
and create a shape that covers your object,
since this is the stall I covered that object (you dont need the polygonal
object to bee too defined)
Note, its important to adjust the Objects position ![]() because your character is going to use that
when he approaches the stall (and remember to place the cross INSIDE a walk able area), also
configure the alignment the character will use when its interacting with the
object as well (using the compass).
because your character is going to use that
when he approaches the stall (and remember to place the cross INSIDE a walk able area), also
configure the alignment the character will use when its interacting with the
object as well (using the compass).

Now we are
ready to create some interaction
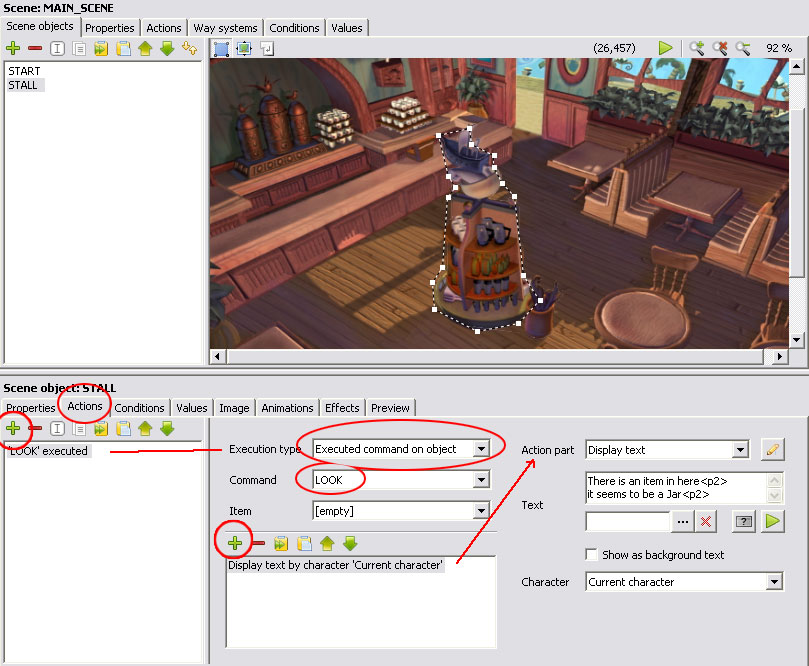
Lets go to
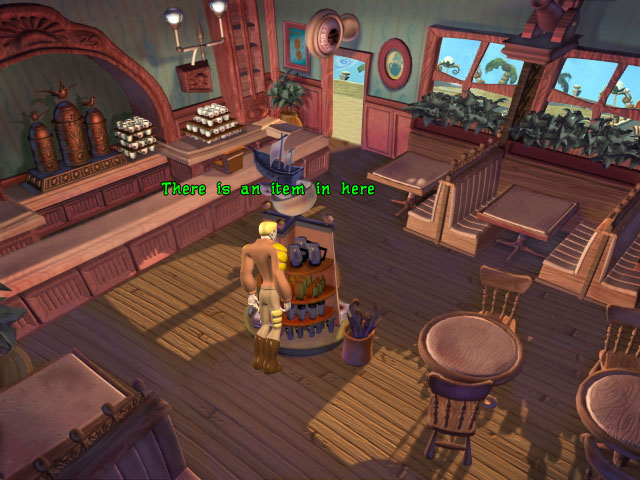
the Actions tab of the STALL and lets add an action, Choose Executed command on object, for the
command LOOK (its
the cursor) then we add the action part, then we add a display text action
where we write whatever we want.
NOTE that I
added a code of <p2> to each line that creates a pause of 2 seconds
between each text is displayed, you can increase the
number depending on the amount of text.
If you
DONT put a <p(number)> at the end of the text, the text will be
displayed forever unless the player clicks with the mouse to stop
it.
You can
also make another character talk when you use the actions instead of the main
character, so you can choose the character on the Character tab if you want an npc to say something instead of the players character.
Save and
run and youll see now that the look at cursor changes when you hover the mouse
over the stall, and after you clicked on the stall the character walked to the
stalls position and then talk..
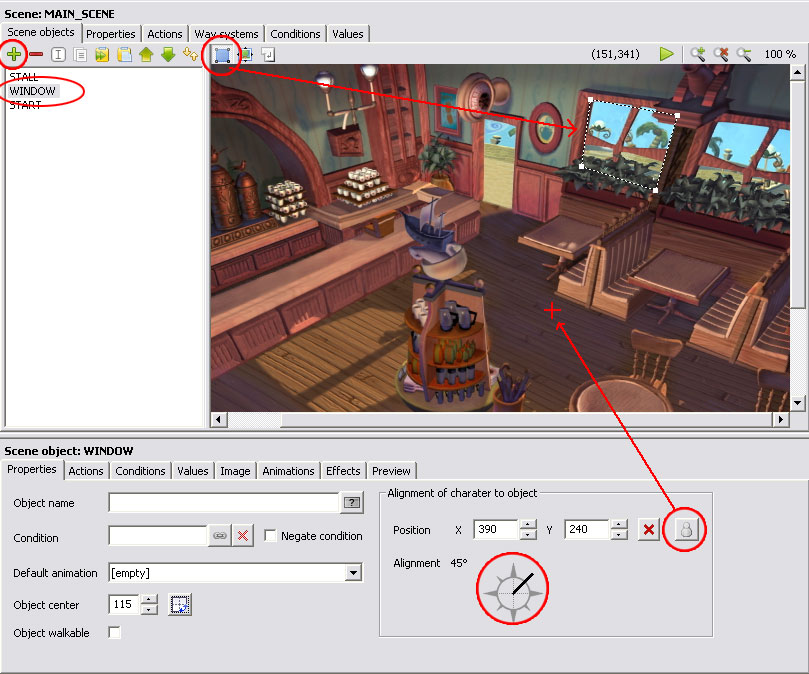
You dont
need to insert a new image to create interactivity, we can create a new object
called WINDOW and use the elements of the background image instead, create a
polygon area around one of the windows in the scene, establish the objects
position (REMEMBER TO PLACE THE CROSS
INSIDE THE WAY BORDER), and establish the alignment the character will have
when it reaches this object.
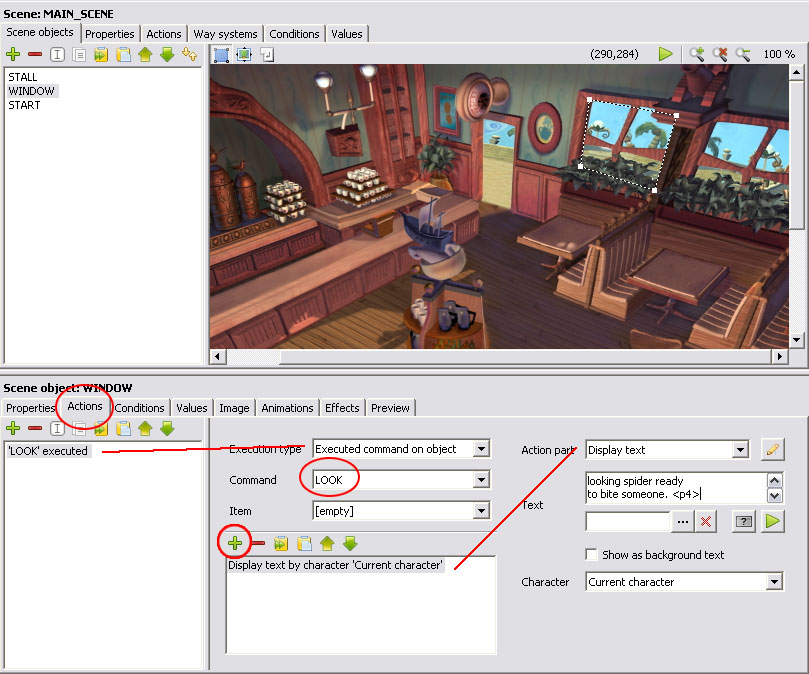
And lets add some actions for that window, it can be something
simple (you can play with the long list of options)
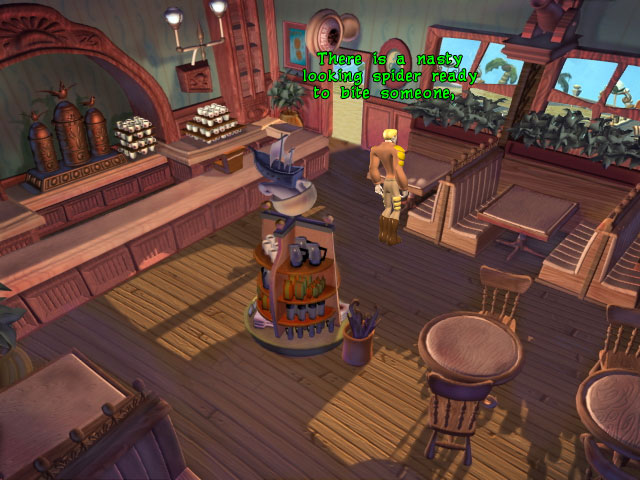
Save and Run your game, you should have a working interaction with the window now. NOTICE how the character got positioned and aligned when it interacted with the window, if the position cross was placed outside the way border the character could have never been able to reach the object and so the actions would have not been performed.
Now you can start adding interactions all over the scene if you like.