5.-TELEPORTING DOORS (GOING TO ANOTHER SCENE)
In the
scenes tab lets create another scene and name it SECOND SCENE (or whatever),
and load a background for it, create the walk able area (way borders) then
create the Way Points (like you did for the
first scene)
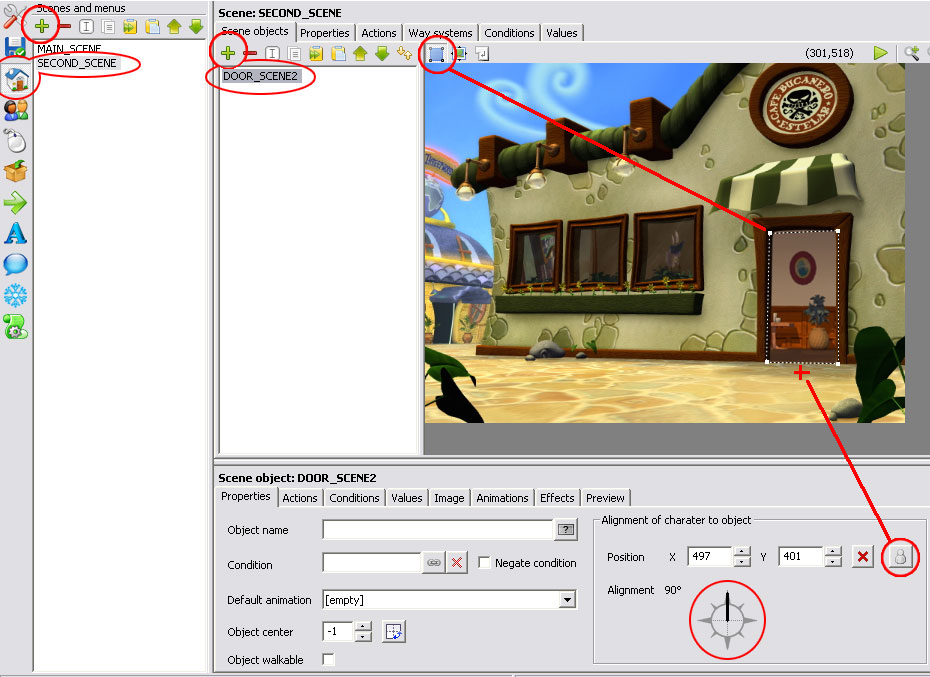
Now create
a scene object ![]() and name it
and name it ![]() DOOR_SCENE2,
set the position
DOOR_SCENE2,
set the position ![]() so it is in front of the door but inside the walk able area and establish
the alignment the character will take when it uses the door, for this door the
character will face north (from the compass)
so it is in front of the door but inside the walk able area and establish
the alignment the character will take when it uses the door, for this door the
character will face north (from the compass)
Then create
the polygon object to cover the door (this is going to be the trigger of the
door).
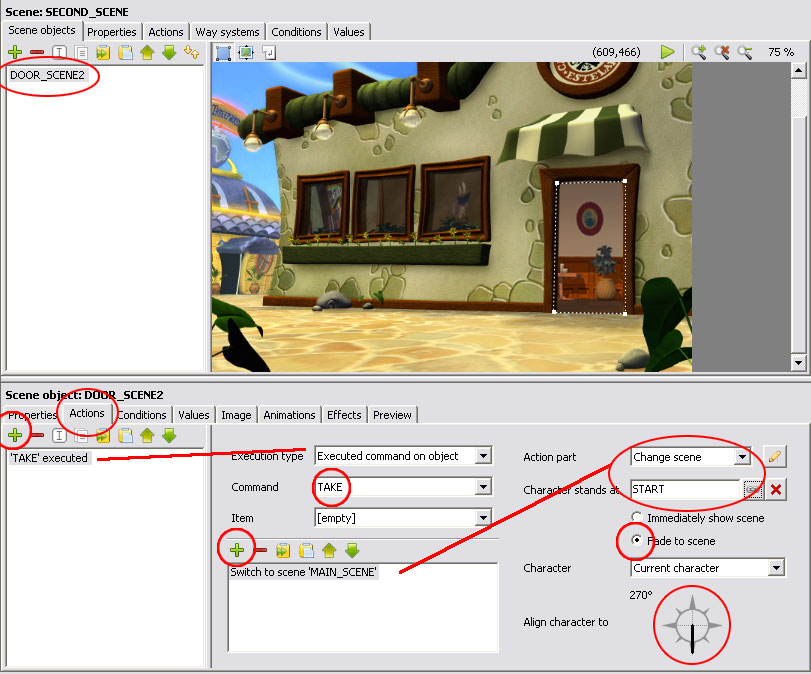
Now lets
add the action for this door, open the ACTIONs tab
and add a new action, of executed
command on object type for the command TAKE (can be for a punter or USE,
but since I only created a few cursors for this tutorial I will choose the TAKE
command)
Add an
action part and change it to CHANGE
SCENE, select the START
object from the FIRST scene (you can later change
the destination to the DOOR we will create later in the first scene, but in
this tutorial the START is located at the door). The alignment
should be established as the starting position in the next scene and we can add
a fade effect so the change between scenes has a nicer feel.
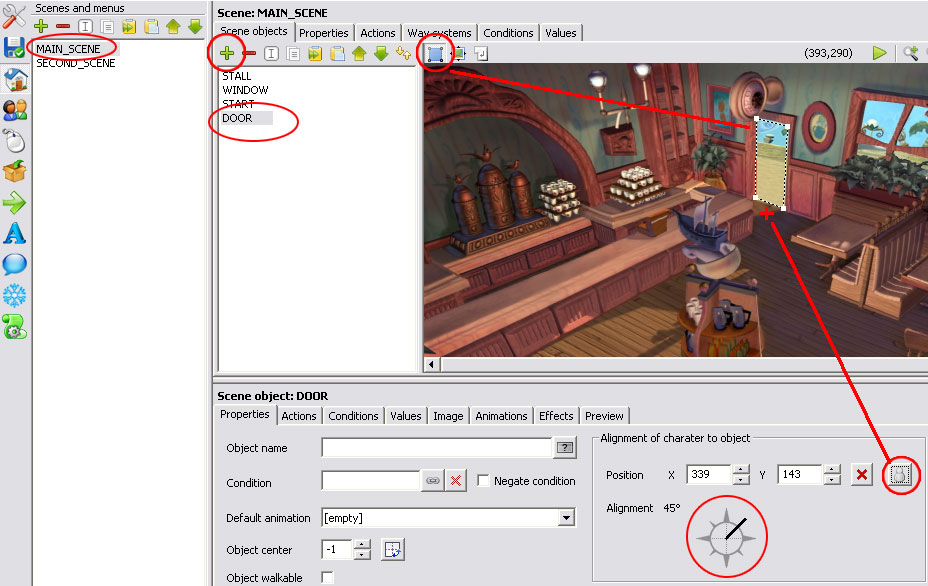
Now in the
MAIN_SCENE create a new object named DOOR, then create the polygon area that
covers the door area of the image, establish the position to be in front of the
door and INSIDE the WAY BORDER, also establish the alignment the character will
face when this door is activated.
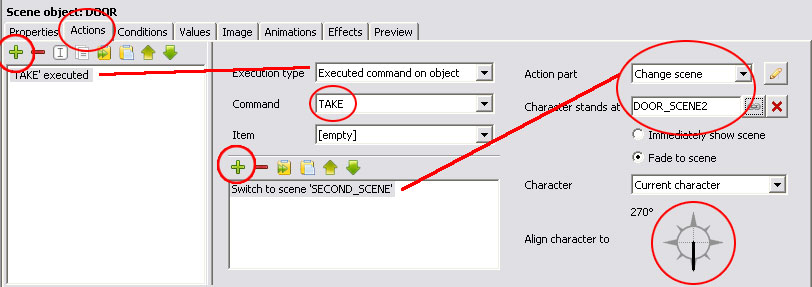
Now go to
the ACTIONS tab and add a new one,
select the Execution command on object
with the command for the TAKE
cursor, the action part change it to CHANGE
SCENE and select the position of the door of the second scene that we
called DOOR_SCENE2. Also establish
the alignment the character will face when it arrives at the second scene
Great, now
you have a working scene where you have some basic interaction with objects and
also where you can teleport to another scene GO TEST IT NOW.
Before I
show you a bit more difficult object interaction we are going to need an
inventory. Shown in part
8.